CSS
How to Disable Checkbox in CSS?

In this article, we will learn the ways to disable a checkbox through HTML, CSS & Javascript.
We will learn each method with the help of example code that will help to grasp the concept instantly & faster.
Contents
How to Disable Checkbox using HTML?
Checkbox can be disabled directly using HTML by applying the disabled attribute to the checkbox element.
Checkbox can be disabled so that the user cannot click it. If the User tries to click it, the checkbox will not get checked & nothing will happen.
Disabling a checkbox gives an option to the Site owner to restrict any particular option from checking.
HTML :-
	<input type="checkbox" /> Option 1 <br/>
	<input type="checkbox" /> Option 2 <br/>
	<input type="checkbox" /> Option 3 <br/>
	<input type="checkbox" disabled /> Option 4 <br/>
Result :-

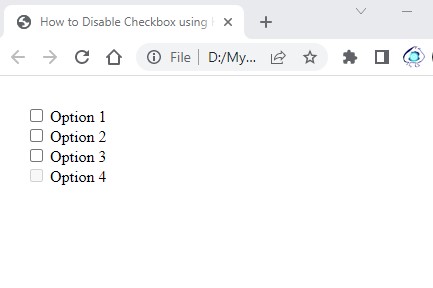
In the above HTML code, we have added 4 checkboxes. The last checkbox has been kept as disabled.
Option 4 checkbox element has been applied disabled property.
The disabled property makes the checkbox unfunctional to the user.
In the Result image, option 4 checkbox can be seen as greyed out & disabled.
How to Disable Checkbox using CSS?
For disabling checkboxes using CSS, we have to use a CSS trick as there is no single property that will disable the checkbox directly.
We will be creating a transparent div & the same will be placed above the checkbox making it unclickable.
The result of this trick will be the same, User will not be able to click the checkbox.
CSS :-
	.outer {
		position:relative;
		display:block;

	}
	.hide{
		position:absolute;
		z-index:2;
		top:0;
		left:0;
		display:block;
		width:100%;
		height:100%;
		background:transparent;
	}
HTML :-
	<input type="checkbox" /> Option 1 <br/>
	<input type="checkbox" /> Option 2 <br/>
	<input type="checkbox" /> Option 3 <br/>
	<div class="outer">
		<div class="hide"></div>
		<input type="checkbox"/> Option 4
	</div>
Result :-

In the CSS code section, we are creating the outer class & this will be the place of the checkbox.
Then we have created a class with a name hide. This class will be placed within the outer class & it will overlap the outer class.
As the hide class will be above the outer class, the outer class checkbox will be hidden behind the hide class making it unclickable.
In the HTML, the Option 4 checkbox is placed within the outer div & another div with class hide is placed within the outer div.
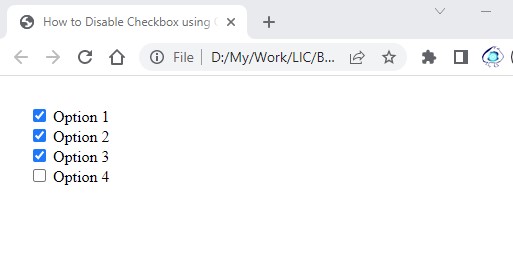
In the Result image, we can see the Option 1 to 3 are checked whereas option 4 cannot be checked & is disabled.
How to Disable Checkbox using Javascript?
To disable the checkbox using Javascript, we set the disabled property of the checkbox to true.
With the help of id, we can specifically disable the checkbox for a single element.
Checkbox can be again enabled by setting the disabled property to false.
HTML :-
	<input type="checkbox" /> Option 1 <br/>
	<input type="checkbox" /> Option 2 <br/>
	<input type="checkbox" /> Option 3 <br/>
	<input type="checkbox" id="checkbox" /> Option 4 <br/>

	<script type="text/javascript">
		document.getElementById("checkbox").disabled=true;
	</script>
Result :-

In the HTML code, we have the same 4 checkboxes. The last checkbox has been given the id.
In the Javascript code, With the help of id, we have disabled the checkbox by setting the disabled property to true.
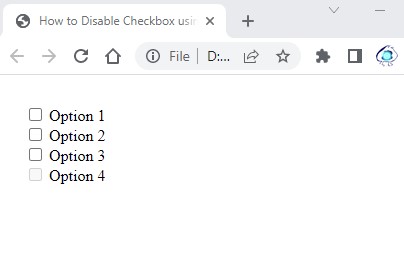
In the Result image, the Option 4 checkbox is disabled.
Summary
In this article, we have learned the tricks to disable the checkbox using HTML, CSS & Javascript.
Assuming this helps to understand. If you have any queries, please comment below.
